How to Identify Birds: A Beginner's 5-Step Field Method
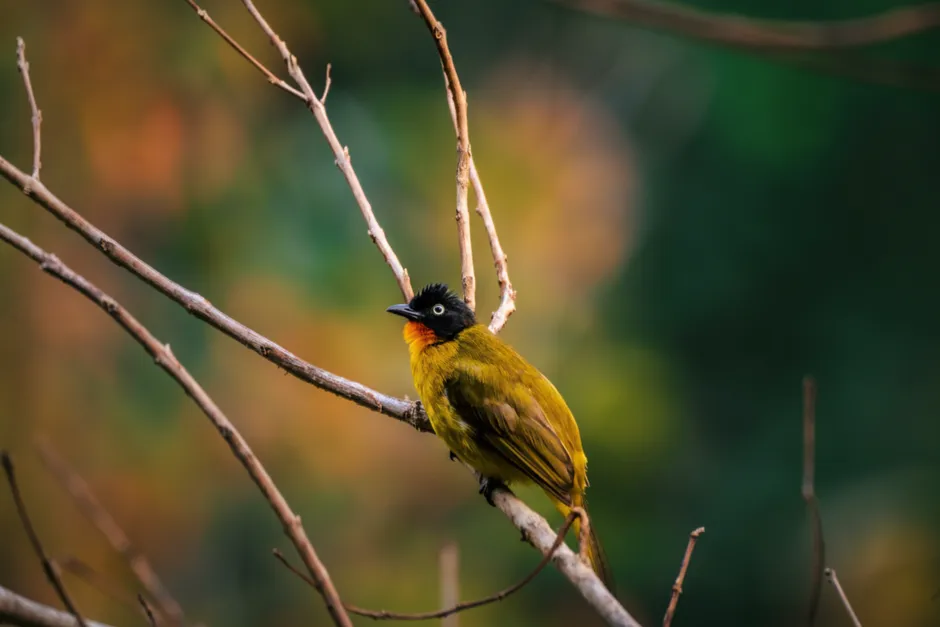
- How to Identify Birds: Start With Size and Shape, Not Color
- The 5-Step Field Method at a Glance
- Step 1: Judge Size Against Birds You Already Know
- Step 2: Read the Shape
- Step 3: Watch What the Bird Does
- Step 4: Factor In Habitat and Season
- Step 5: Confirm With Color and Field Marks
- "What Bird Did I Just See?" — The 10-Second Checklist
- Five Beginner Mistakes That Stall Identification
- Tools That Speed Up the Learning Curve
- Practice Where the Birds Come to You
How to Identify Birds: Start With Size and Shape, Not Color
To identify a bird, work through five observations in order: overall size, body and bill shape, behavior, habitat, and — only then — color and field marks. This is the sequence experienced birders use because size and shape stay constant while color shifts with light, season, age, and sex. Structure narrows a mystery bird to a family; color and pattern finish the job.
Most beginners do the opposite. They see a flash of yellow, flip through a field guide looking for "yellow bird," and drown in forty look-alike options from four different families. The bird flies off, the page never matches, and identification starts to feel like a talent other people were born with.
It isn't. It's a checklist. This guide walks you through the five steps in the order that actually works, gives you a 10-second version for birds that won't sit still, and covers the beginner mistakes that stall most people. One honest note before we start: every bird is an individual. Plumage varies by age, sex, season, molt, and region, so treat every ID as a working hypothesis until the evidence agrees.
The 5-Step Field Method at a Glance
| Step | What you observe | The question it answers |
|---|---|---|
| 1. Size | Overall length vs. a bird you know | Sparrow-sized? Robin-sized? Crow-sized? |
| 2. Shape | Silhouette, bill, tail, posture | What family is this? |
| 3. Behavior | How it moves, feeds, flies | What does it do for a living? |
| 4. Habitat & season | Where and when you're seeing it | Which candidates are plausible here, now? |
| 5. Color & field marks | Wing bars, eye rings, breast pattern | Which species, exactly? |
Steps 1 through 4 usually get you to a short list of two or three candidates. Step 5 picks the winner. Now let's take each step in turn.
Step 1: Judge Size Against Birds You Already Know
Absolute measurements are nearly useless in the field — nobody can eyeball the difference between a 12 cm bird and a 14 cm bird at twenty meters. Relative size is what works.
Anchor every bird you see to a mental ruler of familiar species:
- Sparrow-sized — small songbirds: chickadees, finches, warblers, wrens
- Robin-sized — medium songbirds: thrushes, jays, many blackbirds, smaller woodpeckers
- Crow-sized — large landbirds: crows, many hawks and owls, large woodpeckers
- Goose-sized or bigger — waterfowl, herons, eagles, vultures
Ask one question first: is it bigger or smaller than a robin? That single judgment eliminates roughly half of your field guide before you've noticed anything else.
Two cautions. Fluffed-up birds in cold weather look heavier than they are, and lone birds with nothing nearby for comparison are easy to misjudge — distance shrinks everything. When a bird sits next to something familiar (a feeder, a fence post, another bird), use that comparison; it's worth more than any memorized measurement.
Step 2: Read the Shape
Shape is the most reliable clue in birding. A cardinal in bad light is still unmistakably crested and chunky; a heron at dusk is still a dagger-billed silhouette on stilts. Experienced birders identify many birds by silhouette alone.
Break shape into four parts:
Bill
The bill tells you what a bird eats, which tells you its family.
- Short and conical — a seed-cracker: finches, sparrows, buntings
- Thin and pointed — an insect-eater: warblers, wrens, kinglets
- Chisel-like and stout — a woodpecker
- Hooked — a bird of prey
- Long and dagger-shaped — a fish-spearer: herons and their kin
Tail
Long or short? Notched, squared, rounded, or pointed at the tip? Held cocked upward (a classic wren posture), pumped up and down, or fanned in flight? Tail length and carriage separate many otherwise similar small birds.
Body proportions
Slim and sleek, or plump and round-shouldered? Long-necked or no-necked? Do the wingtips extend past the tail base or fall short of it?
Posture
Upright and vertical like a thrush or flycatcher, or horizontal and crouched like a wren? Clinging to bark like a woodpecker, or perched crosswise on a twig?
Practice this deliberately: next time you see a bird you already know, ignore its colors and describe only its outline. You're training the skill that will carry you when the light is bad — which, in real birding, is most of the time.
Step 3: Watch What the Bird Does
Behavior is identification gold because habits don't molt. Before you reach for binoculars or a camera, just watch for ten seconds. Ask:
- How does it move? Hopping with both feet together, walking one foot at a time, creeping up a trunk, or — the nuthatch specialty — walking headfirst down a trunk?
- How does it feed? Scratching leaf litter like a towhee, hammering bark, flying out from a perch to snap an insect and returning (the flycatcher "sally"), hovering at flowers, or dabbling tail-up in a pond?
- How does it fly? Deeply undulating, wings folded between bursts (typical of woodpeckers and many finches)? Straight and steady like a dove? Soaring in circles?
- Is it alone or in a flock? Some species are reliably social; others are loners outside the breeding season.
- Any signature tics? Tail-wagging, wing-flicking, constant nervous motion versus long still perching — these are consistent, family-level clues.
A plain gray-brown bird that pumps its tail while perched upright on a low branch has told you more about itself in five seconds than its plumage ever will.
Step 4: Factor In Habitat and Season
Birds are habitat specialists. A sparrow-shaped bird singing from a cattail marsh, a suburban hedge, and an open grassland are very likely three different species. Note where the bird actually is:
- Habitat type — forest, edge, open field, marsh, shoreline, suburban yard
- Position within it — treetop canopy, mid-story, understory shrubs, ground, trunk, water surface
Season matters just as much. Most regions have year-round residents, summer breeders, winter visitors, and brief migration-window species. A field guide's range maps do half your work for you: if a species doesn't occur in your region in the current season, it drops off your candidate list — not with absolute certainty, since rarities happen, but firmly enough that the common look-alike deserves your vote first. In birding, the boring answer is usually the right answer.
Step 5: Confirm With Color and Field Marks
Now — and only now — use color. By this point structure, behavior, and habitat have narrowed you to a few candidates, and you know exactly which marks separate them. Field marks are the specific, consistent plumage details field guides highlight:
- Wing bars — one or two pale stripes across the folded wing
- Eye ring — a pale circle around the eye
- Eyebrow stripe (supercilium) — a line above the eye
- Breast pattern — plain, streaked, or spotted
- Rump and outer tail flashes — patches often visible only when the bird flies
Check the head and breast first; that's where the highest-value marks cluster on most songbirds, and it's the part you'll see most often.
Two warnings deserve bold type. Light lies. Strong sun washes colors out, shade turns blues to black, and a backlit bird is a silhouette no matter what it's wearing — one more reason color comes last. And plumage varies: males and females often differ, juveniles can look like different species entirely, and many birds swap bright breeding plumage for drab fall wear. When a mark is ambiguous, fall back on the shape and behavior you noted in steps 2 and 3 — those didn't change.
"What Bird Did I Just See?" — The 10-Second Checklist
Real birds rarely pose. When one gives you only seconds, grab these observations in order, then reconstruct afterward:
- Size — bigger or smaller than a robin?
- Overall shape — chunky or slim? Crest or no crest?
- Bill — thick and conical, or thin and pointed?
- Tail — long or short, and how is it held?
- One behavior — what was it doing?
- One field mark — the single most striking thing you saw
- Where, exactly — ground, shrub, trunk, canopy, water?
Say the answers out loud or type them in your phone immediately. Memory edits plumage with astonishing speed — a note written in ten seconds beats a memory replayed ten times. Even three of these seven answers will usually get you to a family; five will often get you to a species.
Five Beginner Mistakes That Stall Identification
- Leading with color. The mistake this whole method exists to fix.
- Reaching for the guide while the bird is still there. Watch the bird until it leaves; the book will still be there afterward.
- Expecting textbook plumage. Real birds are molting, juvenile, worn, wet, or oddly lit. Match structure first, then accept "close enough" on color.
- Ignoring probability. Rare birds are rare. Start with the common candidate and make the exotic one earn it.
- Demanding certainty. "Some kind of sparrow" is a legitimate identification, and experienced birders log exactly that all the time. Partial IDs are progress, not failure.
Tools That Speed Up the Learning Curve
You can start with nothing but your eyes, but two tools accelerate everything. The first is a decent pair of binoculars — field marks you can't see are field marks you can't use, and our guide to choosing binoculars for bird watching explains the specs that genuinely matter without the marketing fog. The second is a regional field guide or a reputable bird ID app; apps that suggest candidates from your location, date, and description are genuinely useful for beginners, though every suggestion still deserves a check against the five steps — treat the app as a knowledgeable friend, not a verdict.
Practice Where the Birds Come to You
The fastest way to build these skills is repetition with cooperative subjects, and no birds are more cooperative than the ones in your own yard. Start by learning the ten or fifteen common backyard birds in your region cold — their sizes become your rulers, their shapes your reference silhouettes, their habits your baseline for "normal." Then, when something unfamiliar shows up, it registers instantly.
If your yard is quiet, you can change that responsibly: the right food, clean feeders, and water will bring more birds to your yard and turn your kitchen window into a daily practice session.
Then be patient with yourself. Every birder who can name a distant silhouette at a glance was once a beginner squinting at a "little brown bird." Size, shape, behavior, habitat, color — run the checklist a few hundred times, and one day you'll realize you're no longer running it consciously at all. That's when birding stops being a puzzle and starts being a pleasure.